![]()
Master CylinderFollowing the rear brake swap, the feel of the brakes wasn't too reassuring. This was due to the stock 13/16" master cylinder, which meant that the brake pedal had to travel further for the same braking effect. So, as a solution to this problem, I opted to swap in the 1" master cylinder and booster assembly from a GSR, which I got together with the brake swap parts.
Foreseeing problems, I went to the wreckers and pulled a brake line off a wrecked 93 Integra. And since I was there, I figured I'd pull the proportioning valve too. More about that later. Then it was off to Checker's to buy a pipe flaring tool and a pipe cutter for about $12. Sitting on my toolbox, I practiced cutting and flaring the old brake lines until I got the hang of it.
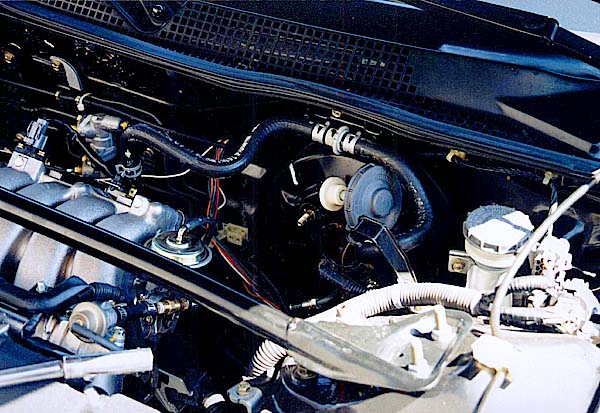
With the huge B18C motor and it's large intake plenum and runners there was no space to move the big GSR brake booster into position. The main problem was the large IAB vacuum dashpot on the B18C runner. Secondly, the part of the booster that connected to the brake pedal stuck out too much. So, the IAB dashpot was removed and using my body weight, I pushed in the booster fully and clamped the end that came out the rear side with a pair of Vise Grips. Still, it took some tricky maneuvering to finally get the booster in and was promptly bolted up.
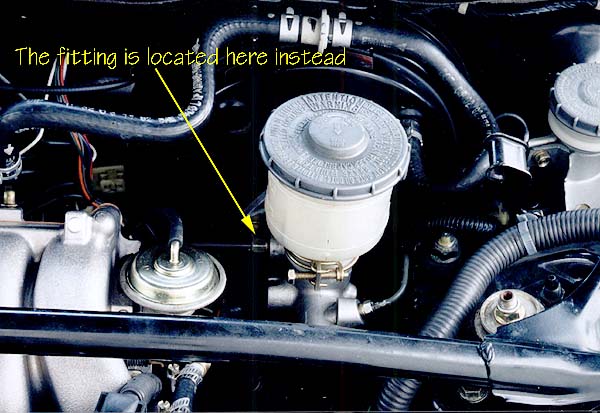
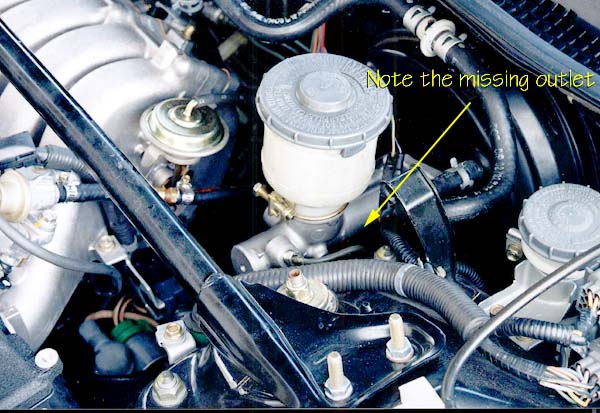
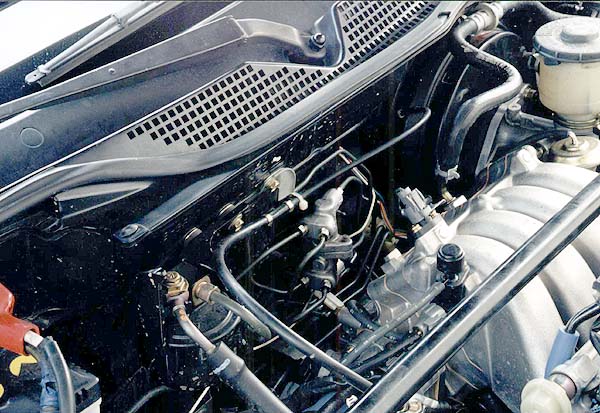
Next was the new master cylinder. It went in without problems. Everything seemed to work right for now. The end of the brake line fit right in, so that was good. Gently I bent the second brake line upright and cut off about 1/2" of the piping to get the smaller fitting out and plopped the larger fitting in its place. With the pipe sticking upright, it was difficult to flare the pipe even with all that practice. After three tries, it looked good, and I proceeded to bend and connect it to the second outlet on the master cylinder. When everything was done it looked beautiful (even if I say so myself) and was pretty stock looking. Proportioning ValveSince the stock proportioning valve did upset the balance of the new brake setup, I decided to go for it and use a proportioning valve off one of Honda's 4-disk setups. Comparing all the proportioning valves, they all looked the same but had different numbers stamped on them. Stock 2-disk, 2-drum setups had a "3030" stamped onto the valve while the 4-disk Integras, regardless of year, had "4040" on them. So you know which ones to look for now.Removing the stock proportioning valve was pretty straightforward, but the pipes had to be bent a little because they reached in pretty deep into the valve (about1/2"). The proportioning valves can not be disassembled because a special bolts is used to bolt it together, and also to the mounting bracket. Looking at the new proportioning valve, only one bolt hole lined up on the mounting bracket. There was no choice except to use that one.
Even though the valves were physically the same, it more wrestling to get the lines attached correctly and to get them bolted in right. But when everything was done, the new valve was very secure, despite the fact that it was only held by one bolt. It had 6 metal brake lines supporting it though so I guess it's secure enough. Finishing UpStarting at the master cylinder, the entire brake system was bled and flushed joint by joint to make sure no air was trapped in the lines. Finally the brakes were bled again at the ends just to be sure and everything seemed to work fine. The vacuum boost line was then reattached to the booster and everything was ready for a test drive.The effects of the brake swap was very obvious after the master cylinder and proportioning valve were changed and the brakes are now VERY responsive. The car now stops on a dime. The next step is to put in the front GSR brake calipers! |
|
|
|
|
|
|
|
(C) 1996, 1997, 1998, 1999 HYBRID Comments? Suggestions? Feedback? Send e-mail to: HYBRID editors |