![]()
| With the new wheels and tires, the extra grip caused a
ton of body roll, so I decided to speed things up and install sway bars
both up front and in the rear.
Due to the easy availability from an friend, I decided on the Suspension
Techniques sway bar kits. Out of the box, these kits came with polyurethane
bushings and functional installation instructions.
|
|
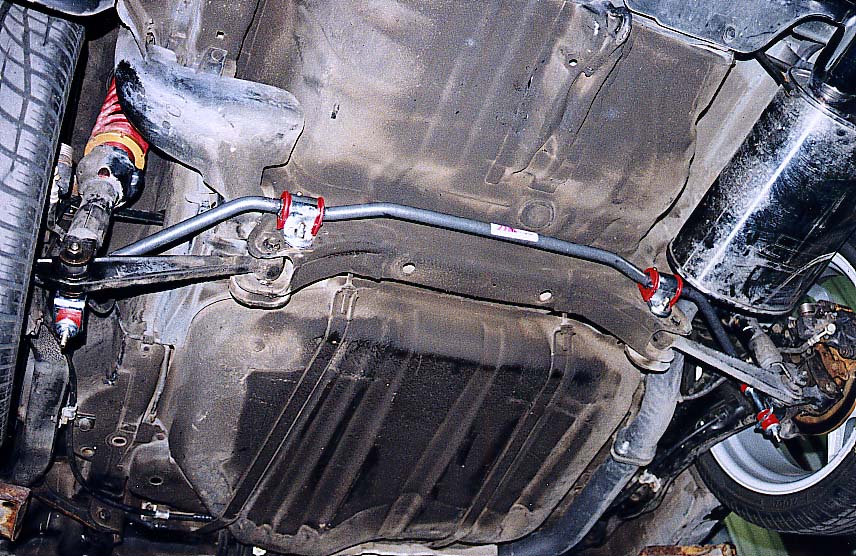
Rear Sway BarInstallation of the rear sway bar was pretty easy, although some minor drilling was reqired for mounting the sway bar pivot points. The two pivot points mount on the rear lower cross member of the chassis. One extra hole had to be drilled so that the brackets could be bolted on, and this proved to be reasonably easy. |
|
| For the ease of future adjustment/reinstallation, I opted
to thread the mounting bolts outwards from within the cross member. This
also gives the suspension's lower arm more clearance at the inboard pivot
point.
The kits also came with adapter bracket mounting points that connected to the lower end of the shock absorbers. We found the instructions to be off here in that the end of the shock must be turned 180 degrees so that the adapter bracket will be in the right position. Finally the bar had to be manoeuvered into place as it actually snakes
in and out of the suspension components. Then everything was bolted down
and checked that everything was clear through the entire suspension travel.
Still, I wonder what will happen if I try to get a lower strut bar in there.
|
|
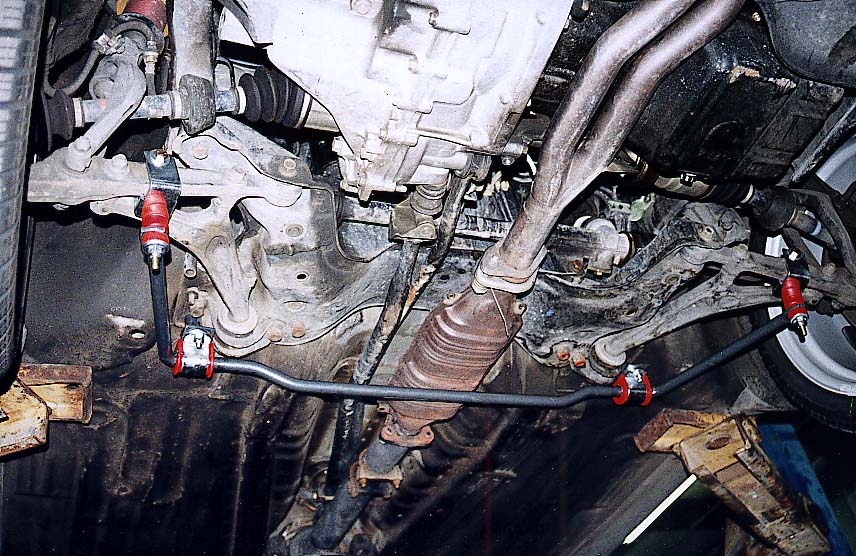
Front Sway BarThe front sway bar was a little more complicated than the rear. As my car did not have any sway bars, the suspension arms did not have the mounting holes. Hence the supplied brackets had to be used.The first step was to get the adapter brackets mounted. This did not
prove to be too difficult and everything bolted on correctly.
|
|
| Next two subframe bolts had to be removed and the supplied
pivot points were put in. The design seemed strange but it seemed very
strong so we decided to take a wait and see attitude.
Bolting the main bar up, I found the clearance between the catalytic converter to the bar to be insufficient, so I went ahead and removed the heat shield, which gave it a little more clearance (about 1.5cm). The rest of the bar went in fine and again I double checked everything. The Test RideTaking the car out for a test drive, I found the handling very much improved. Even with the front bar, the feel is very neutral, although the car seemed to understeer more on lefts than rights.I took it back and double checked everything. Everything seemed fine. I turned my attention to the brakes and true enough, one of the pads on the right rear brake wasn't sitting properly (probably a minor oversight during the brake install). Fixed it and took it out for a spin. With that minor glitch ironed out, the car handles beautifully. No more understeer sideways wheel-hopping. In fact it's easy to push the car into slight oversteer. Got to take it to the track soon to push it to its limits. |
|
|
|
|
|
|
|
|
(C) 1996, 1997, 1998, 1999 HYBRID Comments? Suggestions? Feedback? Send e-mail to: HYBRID editors |