![]()
| With all the work going into the engine, the next
logical step in optimizing the rest of the drive train is to customize
the gearing of the stock GSR gearbox. Gearing is crucial in racing and
is often the difference between a win and a loss as engine development
is usually restrained by the costs involved of those mods (not many can
afford individ.throttle bodies, dry sumps, etc... In addition it seems
gearing is surprisingly often overlooked by the drag-crazed import scene.
Short of going all out and getting a full blown Type-R transmission, I opted instead to swap out the final drive to shorten the gears all round. I decided on the highest FD available from a stock Honda transmission. That of course would be the magical 4.785 from the JDM only 98spec Integra R. Again, all these parts came over from Japan in Eric’s suitcase on his return from his summer trip to the land of the rising sun. While not a particularly difficult modification (nothing really is given the appropriate working environment and tools) it is both time consuming and rewards the detail oriented people. If you’ve never opened a tranny before have someone by your side with at least some prior experience. It really is amazing how many people can get scared away by the sight of an opened transmission case - there really isn’t any black magic to it. Still feeling lucky, then here goes. The necessary parts for this modification are:
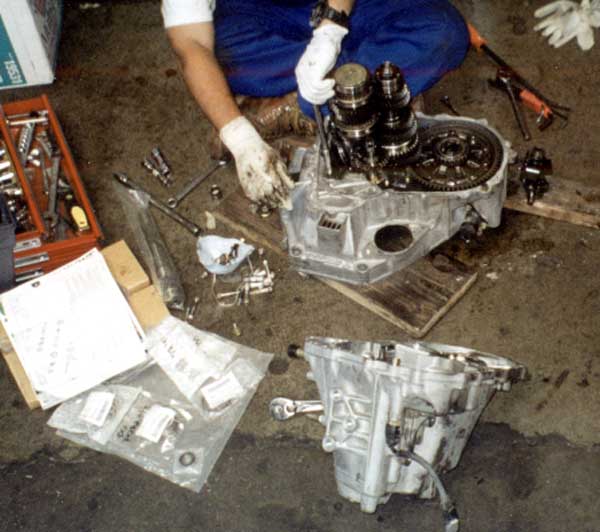
First pull the axles. Then drain and drop the tranny from your B18C motor. Now find yourself a nice clean area to work in as transmission work is definitely for the detail oriented. We need to thank Motorsport Techniques in Hayward, CA for giving us some room to work in and the use of their tools. There is a large brass nut (32mm) (for the lack of a better name) at
the top of the case which need to be removed as when you look inside there
is a circlip holding the main countershaft in place which you will need
to free prior to removal of the casing.
Furthermore there are two small ball bearings you also need to free and make sure you don’t lose. They are located behind two horizontal bolts in the side of the casing. Now with a little bit of prying (careful to not damage it) the case should come right of revealing the gear cluster and housing. Now, don’t panic, it really isn’t that complicated.
Begin by unbolting the reverse/idler fork assy, you’ll see it is a black
looking mechanism held in by 2 10mm bolts to the housing of the transmission.
Don’t strip the bolts - be careful - take your time. Put the reverse/idler
fork off to the side.
You can either begin working on the gear cluster or on the ring gear, the choice is yours. Let’s start with the ring gear and your open diff. BTW now would be
a GREAT time to also add an LSD to your tranny if you thought ahead and
have one handy. Eric is using a clutch type 1.5way unit manufactured by
Spoon and is very happy with it. You could also try the LSD off of the
US IntegraR which is a gear type mechanism. Sorry we are drifting from
the subject.
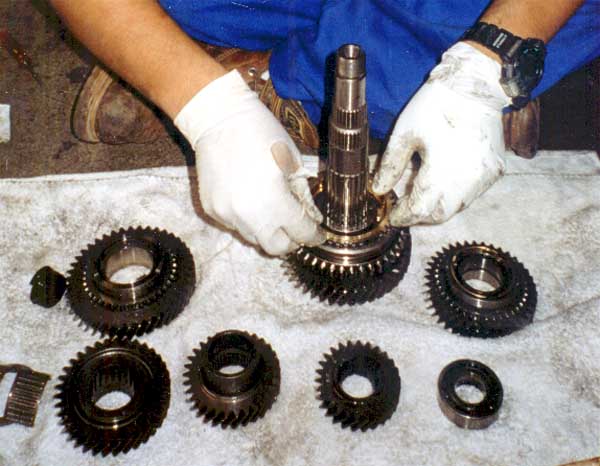
Now that wasn’t so hard was it? Next, let’s move on to the main gear shaft. The big nut (19mm??) needs to be removed as you need to take all the gears and spacers and synchros off of this shaft and swap it for the supplied shaft. This nut is torqued down to 11kgm so it will be a little hard to remove - use some ingenuity. Once this nut is removed you should be able to slide off each set of gear and synchros relatively easy... now MAKE SURE that you keep them in the exact same order as they came off - were you to reverse even one small spacer it could spell disaster for your tranny - trust us it is VERY EASY to make a mistake at this point.
When reassembling the shaft make sure to properly oil all parts using standard 10-30 for example. At this stage there is no reason to skimp on the amount of oil used. Also take care in reassembling hte seals around the gears. The seals are fragile and if they do not rest in the correct notches it will screw stuff up. Finally don’t forget to tighten the top nut to 11kgm and notch it as you would an axle nut.
Here’s where you again need an extra set hands, because in order for the main shaft and countershaft and shifter forks to go in correctly into the tranny housing you need to hold them all together and insert them into their respective locations all at the same time - it is the only way for the whole thing to go back in correctly in one piece. So have someone help you. Once this is done, replace the shifter fork for the reverse and idler gears, retighten the three 10mm bolts - careful not to overtighten them or you will BREAK THEM! At this point with everything back in place you should be able to test your work by manually shifting your tranny from gear to gear.
If everything checks out then replace the tranny casing.
Next, do the two bolts for the bracket that is located next to the pass
mount bolts. These need to be tightened to 5.5kgm.
Do a little prayer and rebolt the tranny to the motor - fill with cheap 10/30 motor oil and give it a try. You should be A-Ok. Congratulations! On a GSR gearbox this nets an overall gear reduction of a around 10%. As far as gear ratios are concerned you know have the equivalent of an R 1st, 2nd, and 3rd. Your 4th and 5th gear actually come out to be CLOSER than in an R gearbox. A word of caution, it has been seen that the added revs (rpm+10%) at cruising speeds on the freeway due to this conversion are usually enough to put your motor at risk of overheating the diminutive 5G stock radiators. Because if this, if you are running without AC you ought to get a GSR radiator, otherwise look into a CivicR 3core AL radiator or some kind of equivalent custom fabricated unit. A lower temp thermostat is optional but surely would not hurt the equation. |
|
|
|
|
|
|
|
(C) 1996, 1997, 1998, 1999 HYBRID Comments? Suggestions? Feedback? Send e-mail to: HYBRID editors |