| 5G Rear Disk Brake Swap
The standard drum brake setup on a Civic is sufficient for the standard
Civic, but when a more powerful motor is swapped in, the next logical thing
to do is to beef up the standard brake setup.
For the 5G Civic (EG series, Honda designation SR3) disk brakes came
standard only on the US EX models but were standard on the JDM Si-RII.
In addition the rear disk brakes and suspension members on the 3G Integra
(DC series, Honda designation ST7) is similar to the Civic, so the parts
from these vehicles can be used in the swap.
Here's the complete shopping list for the rear disk swap:
-
Rear trailing arm with hub assembly for disk brakes
-
Upper control arm
-
Compensator arms (at the front end of trailing arm)
-
Rotors
-
Brake calipers and brackets
-
Brake pads with shims (get the genuine Honda ones)
-
Parking brake cables
Preparation
Since you have all the parts lying on the floor, there's no better time
to clean them up. Using a wire brush attachment on a rotary tool, the calipers
as well as the hub assembly were cleaned up. A coat of heat resistant paint
was then applied to protect the bare metal surfaces.
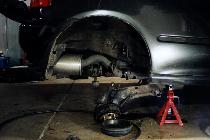
Disassembly
-
Remove the parking brake cover on the inside of the car and release the
parking brake cables from the parking brake equalizer. You might want to
loosen the adjustment nut to make this easier.
-
Release the two bolts that hold the end of the metal parking brake end
and remove the metal holder from the parking brake cables.
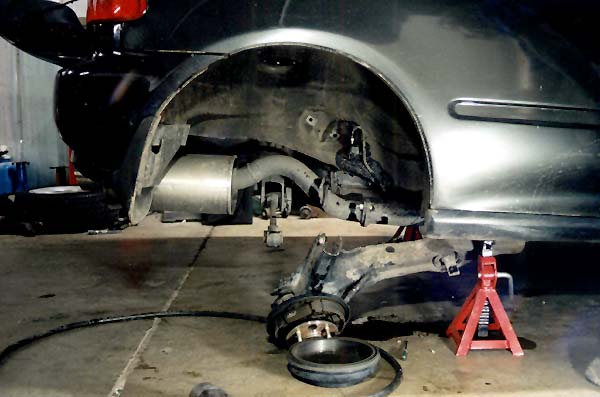
-
Jack the car up front the rear and support it on jack stands. Make sure everything
is secure.
-
Remove the wheel. You're not going to get anything done with the wheel
there.
-
Use a good 10mm wrench and disconnect the brake line. Remove the metal
clip that holds the flexible brake line in place. Brake fluid will start
dripping so put some shop towels to soak up the dripping fluid.
-
Getting under the car, trace the parking brake cables. They should lead
under the exhaust pipe heat shield. Each cable should also have two metal
mounting points on the chassis, somewhere close to the fuel tank.
-
Release the parking cable mounts and try to get the cable free.
-
It might be difficult to reach the cables because the exhaust pipe and
heat shield are in the way, so you might want to remove the exhaust pipe
and bend the end of the heat shield away from the body. Two bolts hold
the end of the heat shield to the chassis.
-
Reach between heat shield and pull out the parking brake cables. If you
released the cables properly, they should come out pretty easily.
-
Here comes the main part. Remove the two bolts on the outer end of the
lower control arm. One is connected to the trailing arm and the other connects
the rear shock assembly to the lower arm.
-
Open the trunk and unbolt the rear shock assembly, and remove it from the
wheel well. You'll find that you can push the lower control arm out of
the way to make this easier.
-
Release the bolt that connects the upper control arm to the trailing arm.
-
Release the two bolts that hold the upper control arm in place and remove
the arm.
-
Go under the car and remove the bolt that connects the front compensator
arm to the chassis.
-
Finally, support the trailing arm while releasing the two main bolts that
hold the main trailing arm on the chassis. The arm should come free and
you can now remove it completely.
Reassemble
-
Connect the new front compensator arm to the end of the new trailing arm.
-
Position the trailing arm and bolt it in place.
-
Bolt the front compensator arm to the chassis. This might be a little tricky
but flexing the trailing arm from side to side helps to line up the bolt
holes.
-
Replace the upper control arm and bolt it in place. The center surface
of the arm should curve towards the rear of the car.
-
Bolt the other end of the upper control arm to the top end of the trailing
arm.
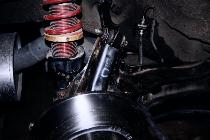
-
Reposition the shock assembly. The lower end of the shock assembly should
have the side with the welded nut facing towards the front of the car.
Bolt the lower end of the shock assembly up to the lower control arm.
-
Now bolt the top end of the shock assembly back to the shock tower. Lifting
the lower arm upwards will make this easier.
-
Put in the last bolt that connects the lower control arm to the lower end
of the trailing arm.
-
Everything should bolt up fine at this stage. Double check that the bolts
are torqued in properly. You don't want anything to come loose on the street.
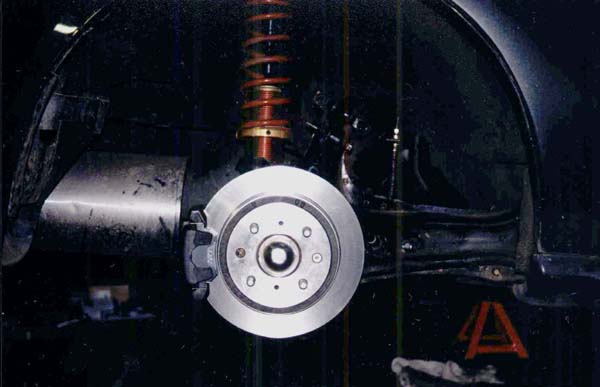
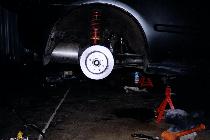
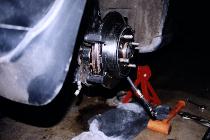
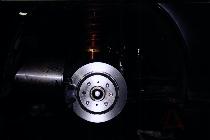
Brake Installation
-
The suspension is now ready for the new brakes. First, put in the rotors
and screw them in place with the 6mm phillips screws. It's not necessary
to tighten these screws like everything else, but make sure that they are
pretty tight so that the rotor is aligned right.
-
Next, bolt in the caliper mounting brackets top the mounting points on
the rear of the hub assembly. Spray the entire brake rotor to get rid of
any residual oil.
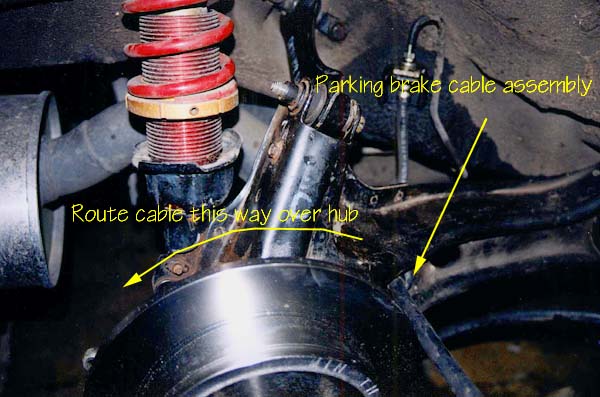
-
Get under the car again and install the new parking brake cables. Insert
the end into the car and oil the cable grommets slightly so that it will
push into the oval holes easily. Make sure you get the left and right sides
correct. The cables are marked on one of the mounting brackets.
-
Run the cable through the rear hole on the trailing arm and over the hub
assembly.
-
Put the pad retainers into the caliper bracket. The center portion of the
retainers should hold themselves against the brackets.
-
Break open the new pads and attach the shims at the back of the pads. Apply
some Molykote M77 on the inside pad (the one with the small metal piece
attached to it). Honda pads should come with shims and Molykote M77.
-
Insert the pad into position. The inner pad should have the small metal
piece on the top end.
-
Before reinstalling the calipers, reset the piston by turning the piston
clockwise as much as possible. A large pry bar in the piston slots will
work, but be careful not to tear the rubber piston boot.
-
Apply some Molykote on the caliper mounting pins and insert the pins into
the caliper bracket. Make sure the pins can slide smoothly in and out of
the bracket holes.
-
Put the pad spring into the hole of the caliper and push the caliper into
place over the pads. Bolt up the caliper to the mounting pins.
-
Connect the flexible brake line to the banjo bolt fitting on the rear of
the caliper. For best fit, the fitting should angle inwards, towards the
caliper.
-
Bolt up the rest of the flexible brake line and reconnect it to the original
brake lines. Everything should fit just right.
-
Pull the parking cable and insert it through the hole in the parking brake
bracket and use the clip (salvaged from the old brake hardware) and clip
it in place.
-
Connect the end of the parking brake to the parking brake actuator arm
and make sure everything is secure.
-
Double check everything just to be on the safe side.
Finishing the job
-
After both sides are done, reconnect the parking brake cables to the parking
brake lever and reassemble the parking cable holder.
-
Using the adjustment nut, adjust the parking brakes until you get a good
initial feel.
-
By now, the brake fluid reservoir should be close to empty. Refill the
brake reservoir and prepare to bleed the brake lines.
-
Fill a clear bottle with 2" of brake fluid and attach a small rubber hose
to the bleed nipples. Dip the other end of the rubber hose into the bottle
of brake fluid.
-
Get a friend to pump the brakes several times and then loosen the nipple.
Air should bubble through the brake fluid in the bottle.
-
With the end of the tube still submerged under the brake fluid, pump the
brake until no more air bubbles can be seen. Make sure the main reservoir
always has enough fluid or you'll end up pumping air back into the lines.
-
Finally tighten the bleed nipple.
-
Repeat for the other side.
-
Just to be sure, bleed the front brakes too. Feel free to flush out the
entire brake system while at it. The final brake feel should be firm, although
you'll find that the brake pedal travel is somewhat more, due to the larger
pistons in the rear calipers. If it feels spongy, it's possible you still
have air in the lines.
-
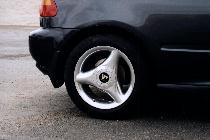
Replace the wheels and lower the car.
-
Driving slowly at first, check your parking brakes to see if they work
right. If they seem too loose, tighten the adjustment nut a little and
try again.
-
Take the car out for a short test drive. Be very careful because the new
pads and/or rotors need some time to get broken in.
Personal Impressions
After the swap, the feel of the brakes was certainly better, but the
increased travel of the pedal was quite disconcerting. Brake balance was
pretty unchanged, but the fronts tended to lock up before the rears. So,
as expected, I later went ahead and swapped out the master cylinder
and proportioning valve. You can read about that here. |