![]()
|
|
|
Tools Required: torque wrench up to 130lbs Torque Specs: axle nut: 130 ft/lbswheel nuts: 80 ft/lbs |
Process: Caliper rebuild You'll want to rebuild the calipers. It's not a big deal. First remove the pads and pad shims (thin metal backing plates, probably stuck to the pads. Find someone with an air compressor..this is a necessity. Remove the banjo bolt from the back of the caliper. Juicy brake goodness will spill out of the hole, so be ready to wipe it up, since it's very acidic, and you don't want to get it on anything you value. You want to insert the business-end of the compressor into this hole. Place a wooden block between the caliper piston and the caliper bracket. When you turn on the compressor, the piston will forcefully fly out. The idea is to get it to shoot into a piece of wood, not your fingers or the bracket. It would likely break your fingers if it hit them..it comes out THAT quickly. |
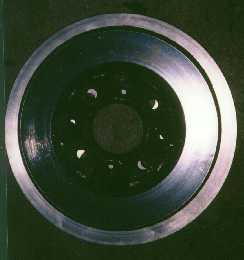
(Old knuckle, rotor, and caliper) |
| Once you get the piston out,
there's a rubber ring inside the piston hole in the caliper.
Remove this with a pencil. Your rebuild kit will have a new
ring. Grease it and insert it. Your rebuild kit will
also have a dust boot to replace the old one. On your caliper
bracket, there are two large bolts. Remove ONE of them.
This will enable you to wing the bracket away from the caliper, and
give you easier access to the piston hole. Getting the Piston
to seat AND not sucking the boot into the hole is difficult, but
gets easier with practice. If you think that the boot is
getting lodged in the chamber, blow the pistong back out with
compressed air and try again. DON'T FORCE the piston in if you
feel the boot is binding..it might tear.
| 
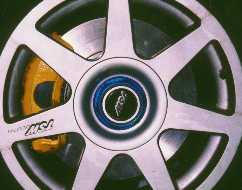
(Old rotor on top of new rotor, quite a difference) |
Install: Test-fit the new rotor, caliper and knuckle while it's off the car. Bolt the rotor to the hub w/out the wheel. Attach the caliper if possible. Mine would not clear, which we'll get into later. If it doesn't clear, don't worry. If it does clear, cool. I know that doesn't inspire confidence, but there's still some things we're trying to clarify on the 5G install. | Before you put the knucle on, you'll need to trim the dust shield. It's of little use anyway, and with it on, your new rotors will rub the shield. Once you've trimmed it and tested clearance, stick it on. Install is the reverse of the removal. It's That sounds simplistic, but it's pretty straight-forward. I can't remember the torque specs of the castle nuts, but the axle nut is 130ft/lbs.
| ||
| Jack the car up, and remove the wheel. Remove the
two set screws holding the rotor on. We needed to torch my screws
to remove them. Use a bolt in the rotor's bolt holes to push the caliper off the
rotor, since it will likely be rusted to the hub. Remove the two bolts
holding the caliper on the knuckle. Place the caliper on something to keep
raised while you remove the knuckle assembly. You don't want to mess
up your brake lines. Remove the cotter pins from the three castle
nuts holding your knuckle in place. You're ready to pull the old knuckle.
Take it out and set it aside.
|
|
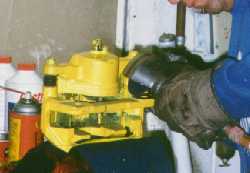
(grinding away the bracket. Click image for a larger picture)
| Brake mods: I had to shave off about 1/8" from the mount on my caliper. This gave me the clearance needed to fit between the rotor and the caliper mount on the steering knuckle. We used a die-grinder and a metal file. You'll want to use calipers too to measure the amount you're taking off. Take off metal in baby-steps. It needs to be flat or you'll wear pads prematurely. |
|
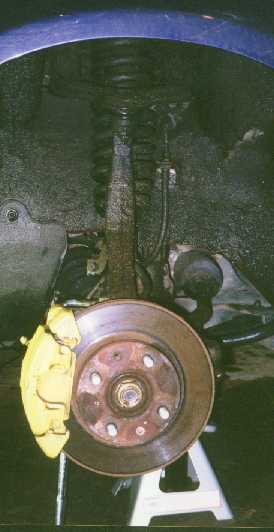
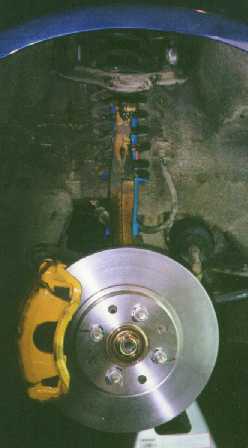
(New assembly in place) |
Brake fitment: Put all the parts back on. Not too tough, it's the reverse of how you took them off. Make sure you buy new cotter pins if needed. I'll update this with all the torque specs as soon as I remember ot get my manual. I left it at my buddy's house.
(The Finished Product!)
|
|
|
|
|
|
|
|
(C) 1996, 1997, 1998, 1999 HYBRID Comments? Suggestions? Feedback? Send e-mail to: HYBRID editors |